To all Android developers:
I am writing this message due to the fact that it is incorrect for a lot of Android app's locale settings to display Simplified Chinese instead of Traditional Chinese if the system setting is "Hong Kong". This makes a lot of noise in Hong Kong recently.
Except for China, all Chinese based region including Hong Kong, Taiwan and Macao are using Traditional Chinese but not Simplified Chinese. It is inconvenient for Traditional Chinese users to read Simplified Chinese. Hence, if your apps would like to provide both Traditional Chinese and Simplified Chinese, please use below settings:
res/value-zh <- Traditional Chinese
res/value-zh-rCN <- Simplified Chinese
Or if you would like to keep the standard TW locale:
res/value-zh <- Traditional Chinese
res/value-zh-rTW <- Traditional Chinese
res/value-zh-rCN <- Simplified Chinese
Or if you would like to specify for all region:
res/value-zh <- Traditional Chinese
res/value-zh-rHK <- Traditional Chinese
res/value-zh-rTW <-Traditional Chinese
res/value-zh-rCN <- Simplified Chinese
Never use Simplified Chinese string in value-zh as you can use value-zh-rCN to get the right result. If devices do not support rHK, all these devices could still get the correct locale if value-zh string is Traditional Chinese.
As English is also an official language in Hong Kong, if your apps support Simplified Chinese only, please put the English string to res/value-zh-rHK (At least the rHK supported device can get the right locale). Or you can send me an email with the Simplified Chinese string.xml attach, I'll try my best to help you to organize and translate the Simplified Chinese to Traditional one.
Best Regards,
Allen Chan
(An Android developer in Hong Kong)
email: allen517@gmail.com
Saturday, December 15, 2012
Tuesday, November 27, 2012
Tuesday, October 30, 2012
先拍照後對焦, 攝影新玩意 - Lytro 光場相機
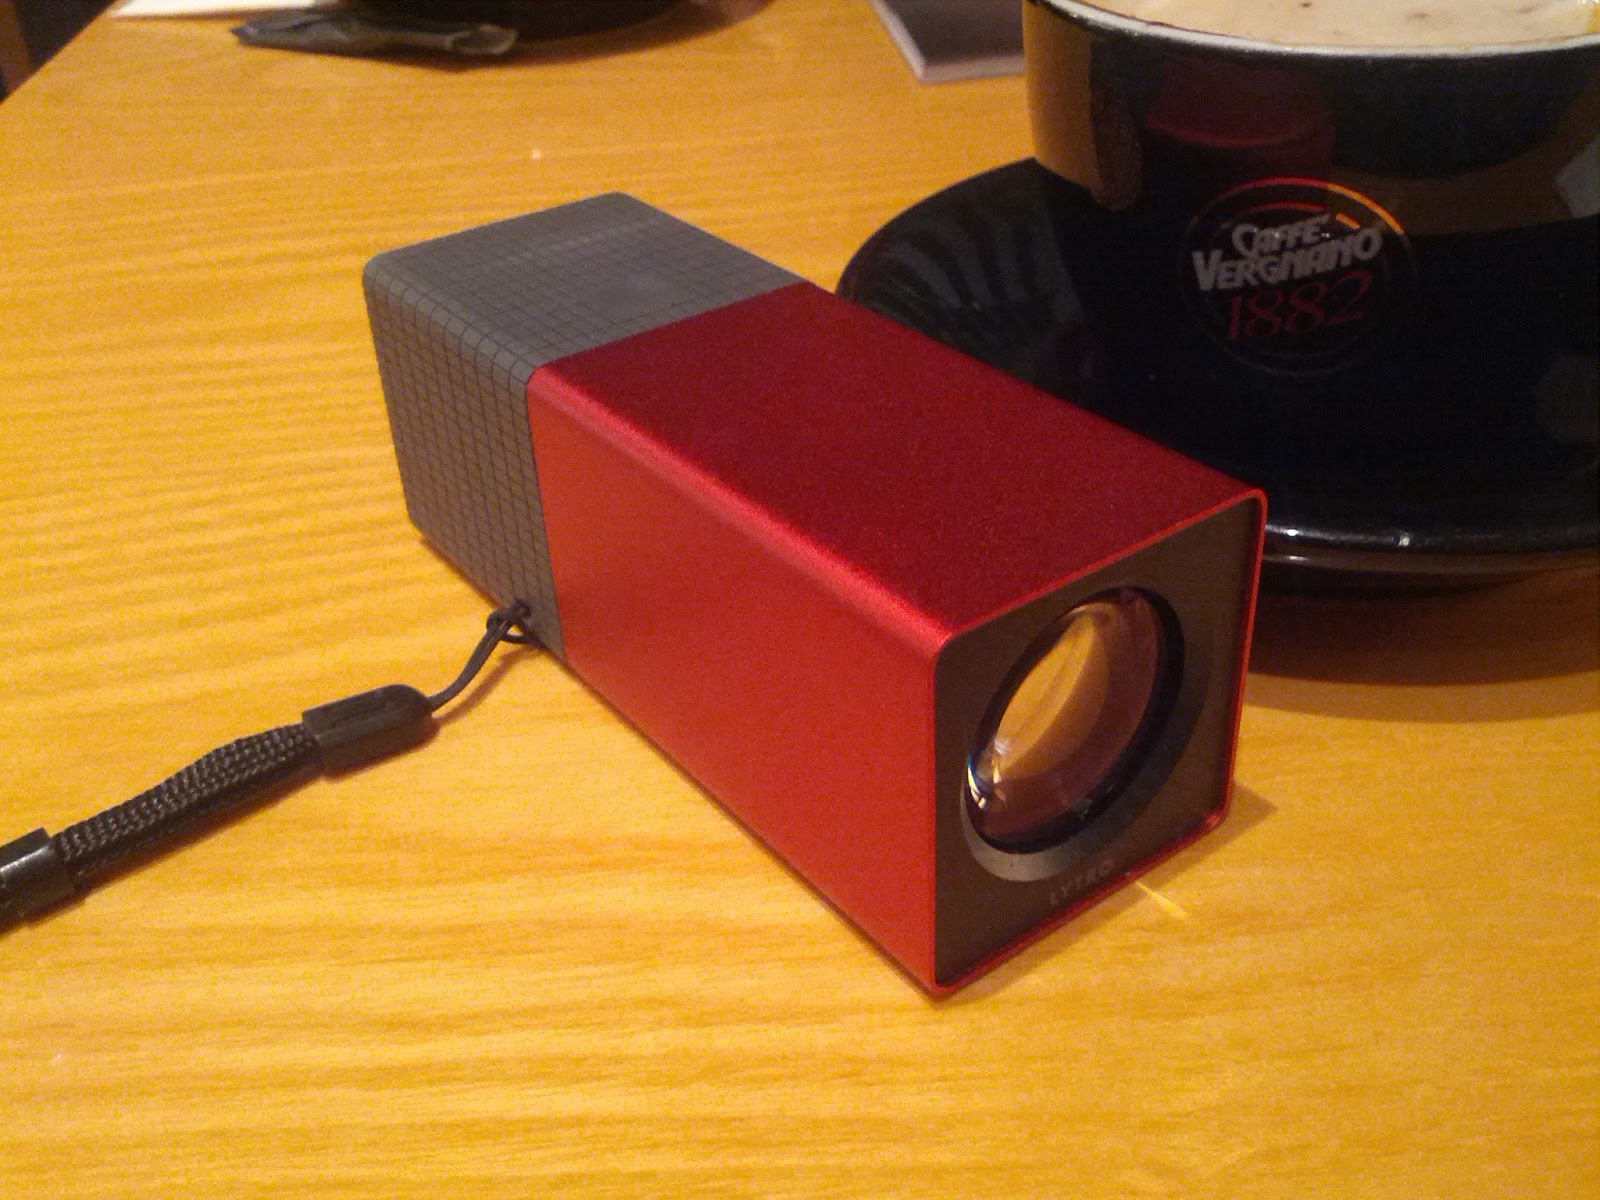
Lytro 於早前發放光場相機 Demo 圖後吸引了不少攝影愛好者, 因為其先拍照後對焦功能十分新穎. 期待過一段日子後, Lytro 近日正式登陸香港, 身邊有唔少朋友已經即時入貨, 雖然價錢唔算平, 解像度又唔高, 但依然無礙其吸引力.
光場相機既技術係拍攝時一次過將畫面前後景同時記錄, 再經過特製 viewer 顯示圖片, 只要點擊圖上任何一點就可以改變對焦點. 其有趣效果要自己試過才感受得到:
有趣吧?
相機設計簡潔, 輕觸式面版操作方便, 拍攝時間快亦不用擔心對焦問題. 但相機並非完美, 相機機身較重, LCD 顯示解像度亦較低, 但只屬少問題吧. 對我來說最困擾的是過相只可以使用 pc 或 mac 機, 如在街上沒有電腦跟身就完全沒法上載相片上網了.
Friday, September 28, 2012
香港快拍+ v5.1.0 更新
- 增加穩定性
- 轉用另一個天氣資訊供應商,因早前 google weather api 正式關閉引致本 app 經常 force close 之問題亦隨之解決。
- 新增以下位置:
粉嶺公路近港鐵粉嶺站
獅子山隧道公路近紅梅谷路
港深西部公路近廈村
元朗公路近丹桂村
大欖隧道元朗入口
大欖隧道汀九入口
南灣隧道昂船洲大橋入口
沙田嶺隧道沙田入口
象鼻山路近美環街
西區海底隧道香港入口
西區海底隧道九龍入口
大老山隧道九龍入口
東區海底隧道九龍入口
大老山隧道沙田入口
Download From Google Play
Monday, September 24, 2012
增加按鈕可按面積
在設計 ui 時侯因為要遷就版面, 有時按鈕被迫佔用較少位置, 手指頭大的用家當然會按得較吃力, 解決方法好簡單, 使用 TouchDelegates 增大可按面積就可以了:
以下 example 來自: http://www.thomas-manthey.net/2012/03/04/android-basics-using-touchdelegates/
使用方法:
將 getTouchDelegateAction 放入自己常用 library, 以後按需要直接使用, 紅黑紅紅黑, 就係咁簡單.
以下 example 來自: http://www.thomas-manthey.net/2012/03/04/android-basics-using-touchdelegates/
1 2 3 4 5 6 7 8 9 10 11 12 13 14 15 16 17 18 19 20 21 22 23 24 25 26 27 28 29 30 31 32 33 34 | /** * Adds a touchable padding around a View by constructing a TouchDelegate * and adding it to parent View. * @param parent The "outer" parent View * @param delegate The delegate that handles the TouchEvents * @param topPadding Additional touch area in pixels above View * @param bootomPadding Additional touch area in pixels below View * @param topPadding Additional touch area in pixels left to View * @param topPadding Additional touch area in pixels right to View * @return A runnable that you can post as action to a Views event queue */ private static Runnable getTouchDelegateAction(final View parent, final View delegate, final int topPadding, final int bottomPadding, final int leftPadding, final int rightPadding) { return new Runnable() { @Override public void run() { //Construct a new Rectangle and let the Delegate set its values Rect touchRect = new Rect(); delegate.getHitRect(touchRect); //Modify the dimensions of the Rectangle //Padding values below zero are replaced by zeros touchRect.top-=Math.max(0, topPadding); touchRect.bottom+=Math.max(0, bottomPadding); touchRect.left-=Math.max(0, leftPadding); touchRect.right+=Math.max(0, rightPadding); //Now we are going to construct the TouchDelegate TouchDelegate touchDelegate = new TouchDelegate(touchRect, delegate); //And set it on the parent parent.setTouchDelegate(touchDelegate); } |
使用方法:
1 2 3 4 5 6 | //Get references to the View in the layout parent = (View) findViewById(R.id.parent); delegateButton = (View) findViewById(R.id.cmdClickMe); //The TouchDelegate has to be set after everything has been calculated and drawn parent.post(getTouchDelegateAction(parent, delegateButton, 50,50,50,50)); |
將 getTouchDelegateAction 放入自己常用 library, 以後按需要直接使用, 紅黑紅紅黑, 就係咁簡單.
Tuesday, September 18, 2012
Android 華麗介面匯聚
Android 工程師 Romain Guy 剛分享了一個連結, 內含大量華麗軟件截圖, 要設計一個吸引人的軟件絶不容易, 現在不妨參考一下高手的作品吧.
http://androidniceties.tumblr.com/


http://androidniceties.tumblr.com/
Tuesday, September 4, 2012

Subscribe to:
Posts (Atom)